
After completing this lesson, you’ll be able to:
In this lesson, you will:
After completing this lesson, you’ll be able to:
In this lesson, you will:
Deployment parameters are key-value pairs that let you use named parameter values across multiple workflows. One key use for deployment parameters is to allow workspaces uploaded to multiple FME Flow environments (e.g., development, test, and production) to run without requiring parameter values to be updated across these environments. When you reference a deployment parameter in a workspace, FME automatically uses its unique value, ensuring smooth workflow transitions. FME Flow stores deployment parameters; however, you can create and edit Deployment Parameters on either FME Form or FME Flow.
As of FME 2026.1, there are four types of deployment parameters:
Deployment parameters help accomplish the following:
You may create deployment parameters directly from FME Flow or FME Workbench, and they reside on FME Flow. To access and create deployment parameters from FME Workbench, you must connect to an FME Flow.
To create a deployment parameter from the Navigator window, right-click Deployment Parameters and select Create Deployment Parameter...
Since FME Flow stores all deployment parameters on FME Flow, the first step is to ensure you have selected and successfully connected to your FME Flow instance. You may have multiple FME Flow instances and connections, so it's important to ensure you connect to the FME Flow you want to create the deployment parameter for. For the parameter itself, you must give it a name, select the type, and then enter the value. A database connection parameter requires you to enter the database type and select a connection, while a text parameter only asks you to enter the text string value.
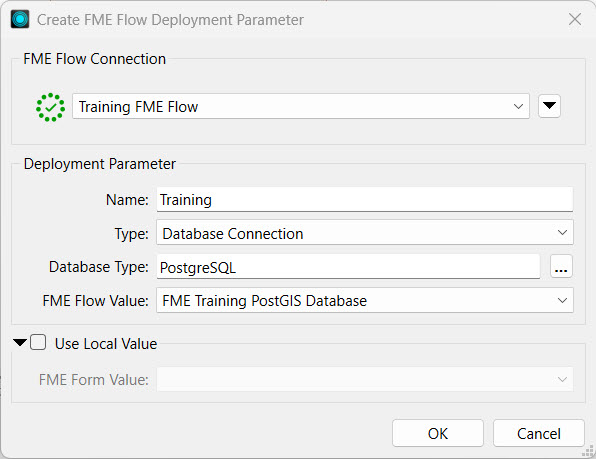
There's also an option to assign a different value when you use the parameter on FME Form, which is useful when testing workspaces before publishing.
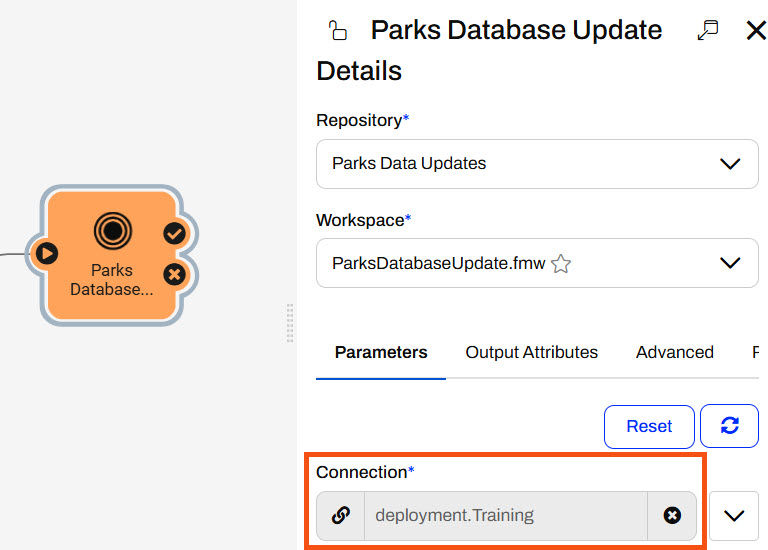
After you create the parameter, you must link it to the reader, writer, or transformer that will reference the parameter value. For example, you might link a password parameter to a Connector transformer that requires a username and password authentication or link a database reader to a database connection parameter.

The deployment parameters you may link to include those you've created in FME Flow and FME Form, since FME Flow stores all deployment parameters.
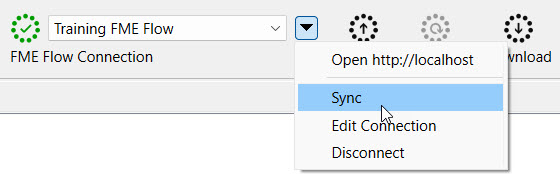
If you connect to a different FME Flow instance from FME Form, the available deployment parameters will change to match the parameters stored on that instance. To ensure you see all the deployment parameters in FME Form, you need to sync from the FME Flow Connection toolbar. You should sync FME Form and FME Flow after you create or edit any deployment parameters.
In FME Form, you can only create and link to deployment parameters within workspaces. FME Flow manages, creates, and stores the parameters and their values.
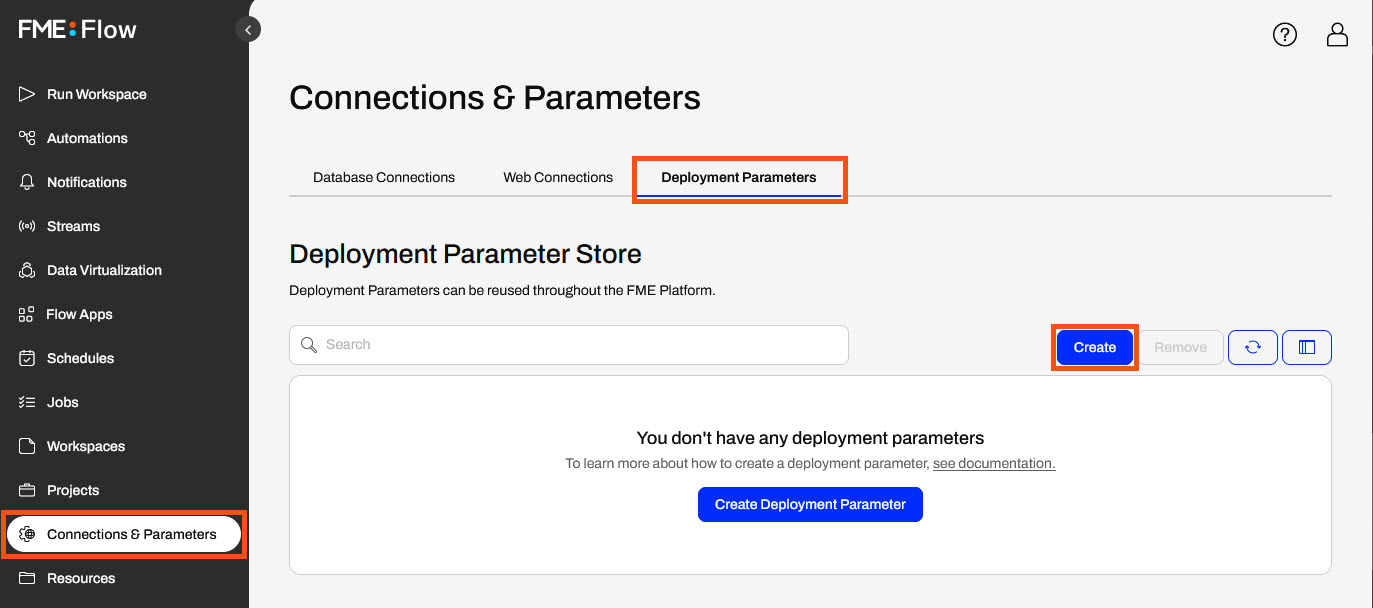
The Deployment Parameter Store is a centralized repository for all deployment parameters for a given FME Flow instance. You access it from Connections & Parameters on the side menu. For each parameter, you see the name, type, and value you assign to the parameter.

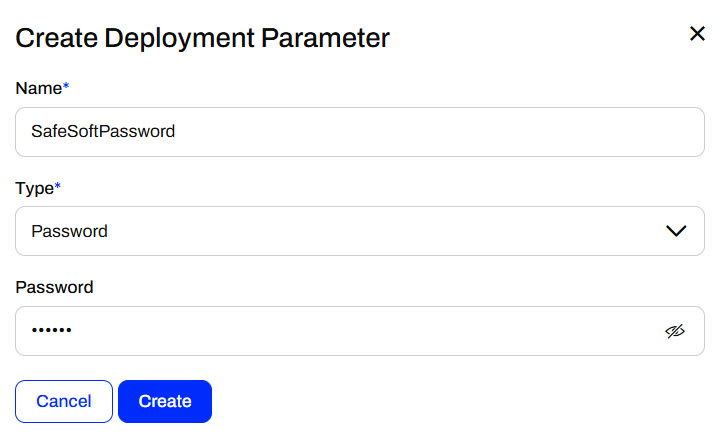
To create a deployment parameter, click Create and fill out a form identical to the one in FME Form except for the FME Flow value.
Once you create the parameter, you can use it in your FME workflows. You can sync your FME Form to your FME Flow instance and link deployment parameters directly in the workspace before deploying it on FME Flow or reference deployment parameters in Automations on FME Flow.
You may link to deployment parameters in Automations or workspaces. For workspaces, you must link the parameter in FME Workbench and then publish the workspace to FME Flow. In FME Flow Automations, you link deployment parameters to the workspace's user parameters. For example, you configure a workspace with a database connection parameter as input and then link a database connection deployment parameter.
Now, if you migrate the Automation to another FME Flow, perhaps from your Development to your Production instance, the Automation will continue to reference the deployment parameter, but the value may be different. The Production FME Flow needs a different database connection to run the workspace. As long as the deployment parameter with the same name references the Production database connection, you don't need to alter the Automation to run on the Production instance to use the proper connection. Whether you reference deployment parameters directly in workspaces or in Automations, the same principles apply to migrating workflows between FME Flow instances.
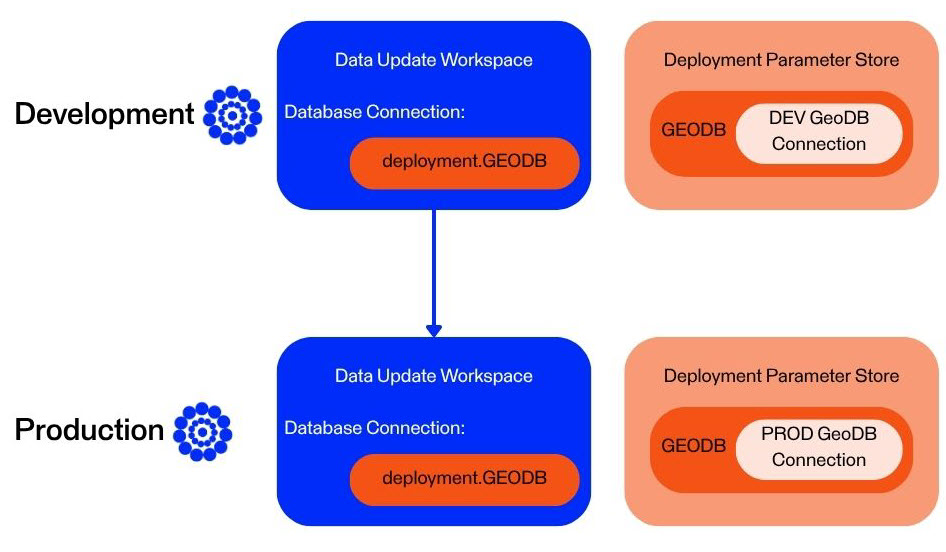
Deployment parameters are essential in CI/CD (Continuous Integration/Continuous Deployment) workflows to deploy FME Flow consistently across different environments (e.g., development, staging, production) without modifying the core workspaces or project files. You can use the same components while dynamically injecting the correct values during deployment by setting environment-specific values—such as server URLs, database credentials, and file paths—as deployment parameters. Deployment parameters eliminate manual edits, reduce the risk of configuration errors, and make deployments repeatable and reliable.
When you use deployment parameters alongside the FME Flow CLI (Command Line Interface), you can pass deployment parameters directly into commands to automate FME Flow configurations. Without human intervention, the script would supply different parameter values based on the FME Flow deployment environment, enabling fully automated continuous integration and deployment.
For more information on deployment parameters and how to use them with CI/CD workflows and the CLI, see these tutorials:

Jennifer is a GIS Specialist for a city government's GIS department. She is continuing with her workspace from the previous exercise and wants to configure the workspace to use deployment parameters. The workspace reads data from a PostGIS database, and referencing the database connection as a deployment parameter will allow Jennifer to move the workspace across multiple environments without having to edit the workspace or connection. Jennifer wants to use a different database connection when she runs the workspace in FME Workbench and another when she runs it on FME Flow.
For this exercise, follow the steps below to help Jennifer create and use deployment parameters across FME Workbench and FME Flow.
You will only have one database to connect to for training, the FME Training PostGIS database. However, the theory of using deployment parameters will remain across FME Workbench and FME Flow to reference a different connection through the same parameter.
Navigate to FME Flow and open the Deployment Parameter Store. Click Create to make a new deployment parameter.
Set the following values:
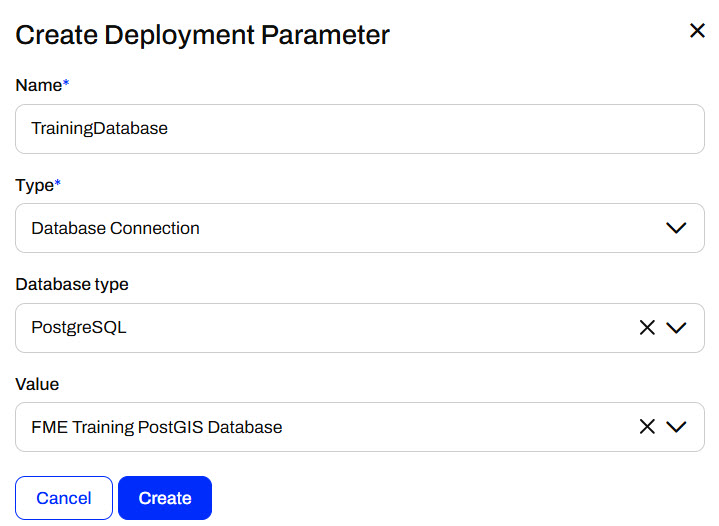
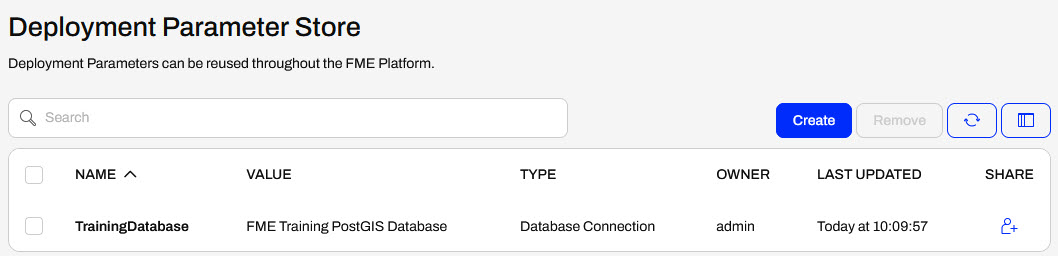
Click Create, and FME Flow adds the deployment parameter and value to the Deployment Parameter Store. FME Flow will use this connection when any workspace linking to the TrainingDatabase deployment parameter runs on this FME Flow.
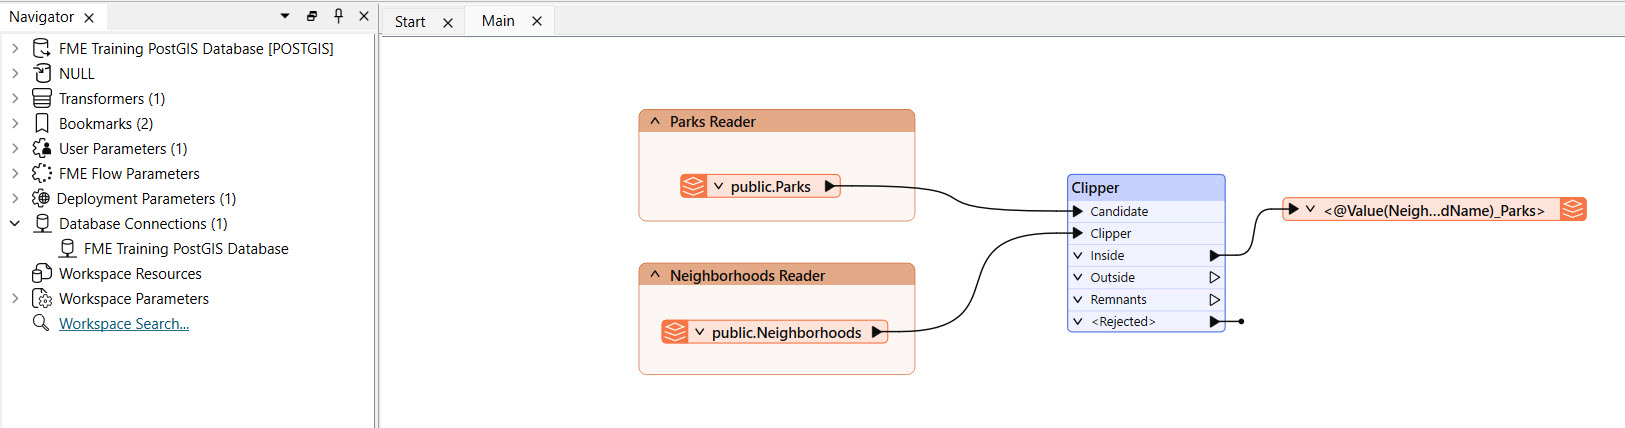
Open FME Workbench to the starting workspace (C:\FMEData\Workspaces\DeployWorkflowsWithFMEFlow\deploy-workflows-to-multiple-environments.fmw). This workspace is the same as the completed workspace from the previous exercise; you may continue with it if you have it open.
Click the drop-down arrow next to the FME Flow Connection, then Sync to sync FME Workbench with FME Flow.

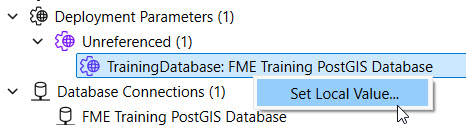
In the Navigator, expand Deployment Parameters, and you will see your new database connection parameter.

To use a different database connection when running the workspace on FME Workbench, right-click the TrainingDatabase parameter and select Set Local Value...
Set the FME Form Value to the FME Training PostGIS Database and click OK.
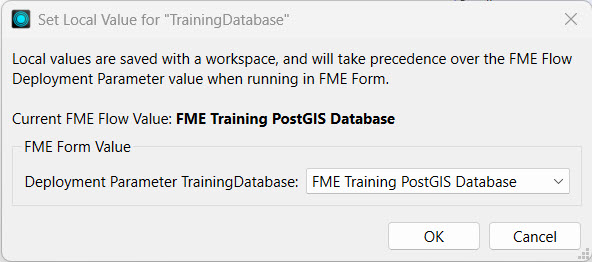
This is the same PostGIS Training database as the FME Flow connection references. Due to training limitations, you only have one database available to connect to so they are technically the same on FME Form and FME Flow in this example. However, in real-world applications, the FME Form value would be a different database connection than the FME Flow one.
Expand the POSTGIS reader parameters in the Navigator, right-click on the Connection, and select Edit Parameter Value...
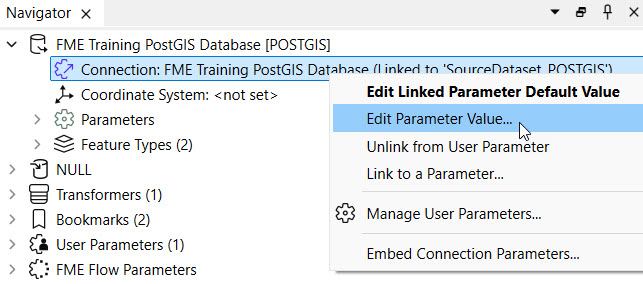
Select the TrainingDatabase deployment parameter for the Connection, found within User Parameters, from the drop-down menu.
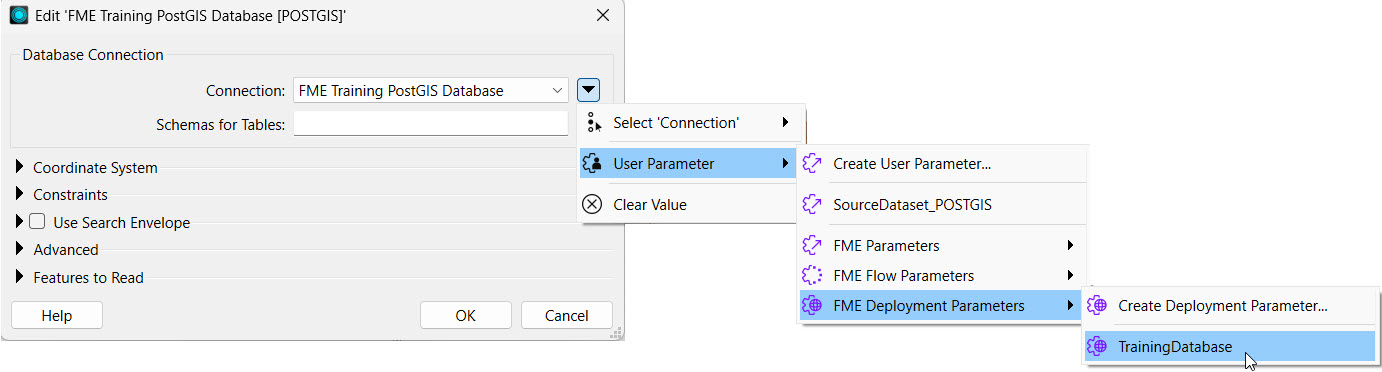
The source database connection now links to the deployment parameter. Click OK.
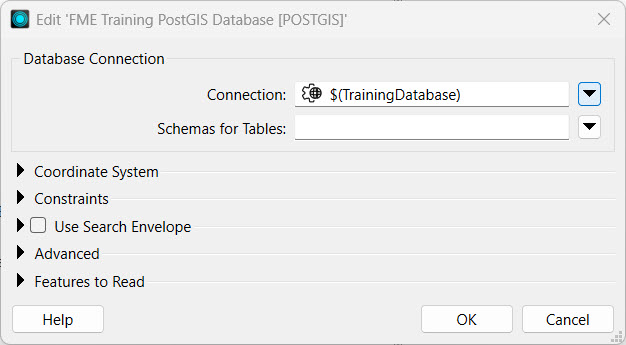
Since deployment parameters control values based on the environment where the workspace runs, having a user parameter that allows the end-user to change the database connection value does not make sense. Expand User Parameters and delete the [SourceDataset_POSTGIS] Connection parameter.
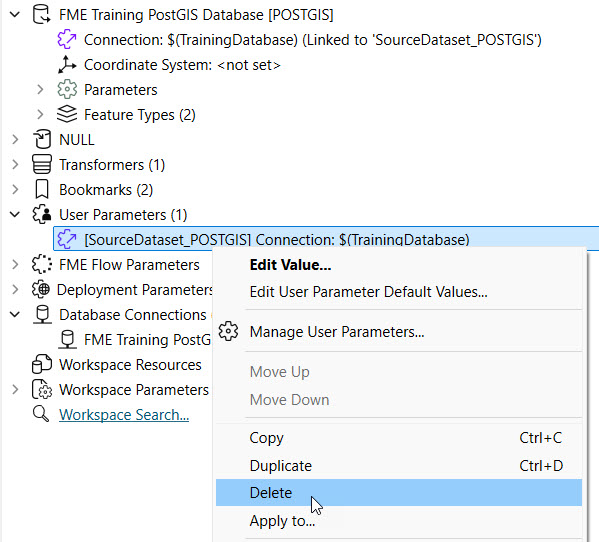
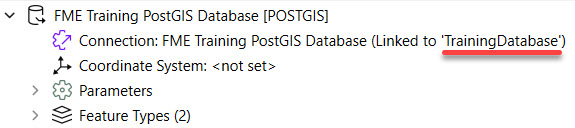
The PostGIS Connection now only references the TrainingDatabase deployment parameter.
Run the workspace to ensure it uses the deployment parameter to link to the database connection before deploying it on FME Flow.
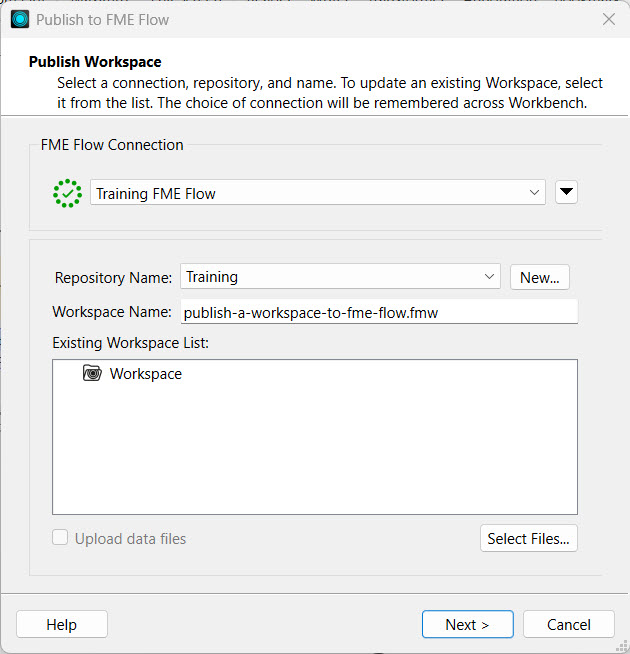
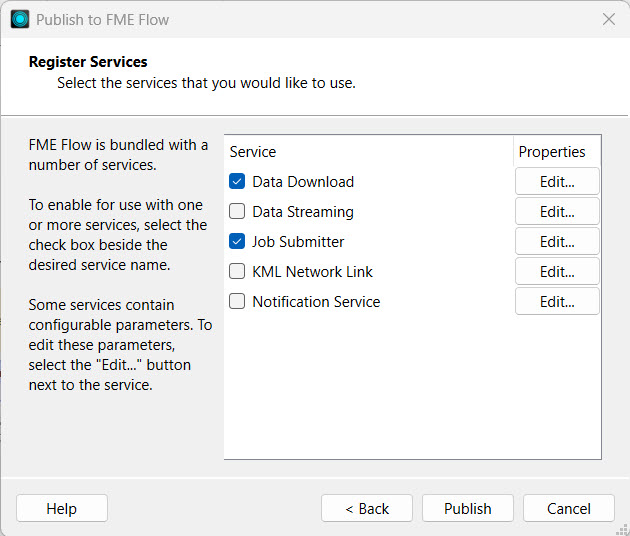
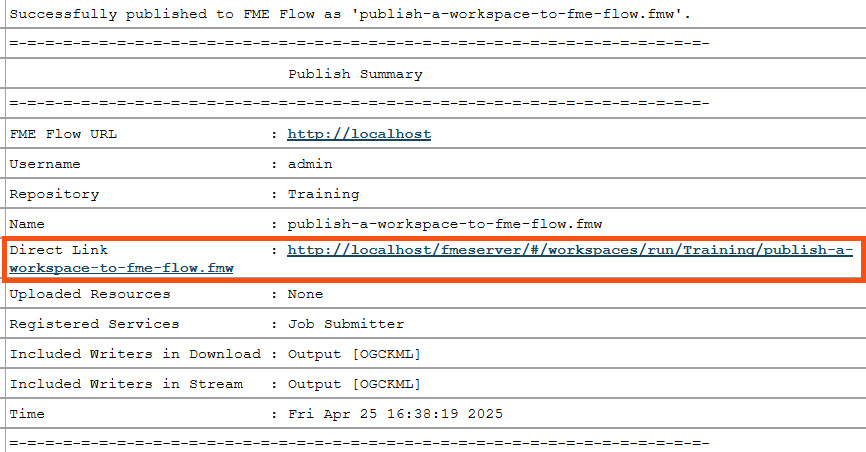
Publish the workspace to FME Flow, save it in the Training repository, and register it with the Job Submitter service.


A workspace with a connection would normally prompt you to choose whether or not to publish the connection along with the workspace to FME Flow. However, because the reader connection parameter references the deployment parameter, there is no direct connection by default to publish with the workspace.
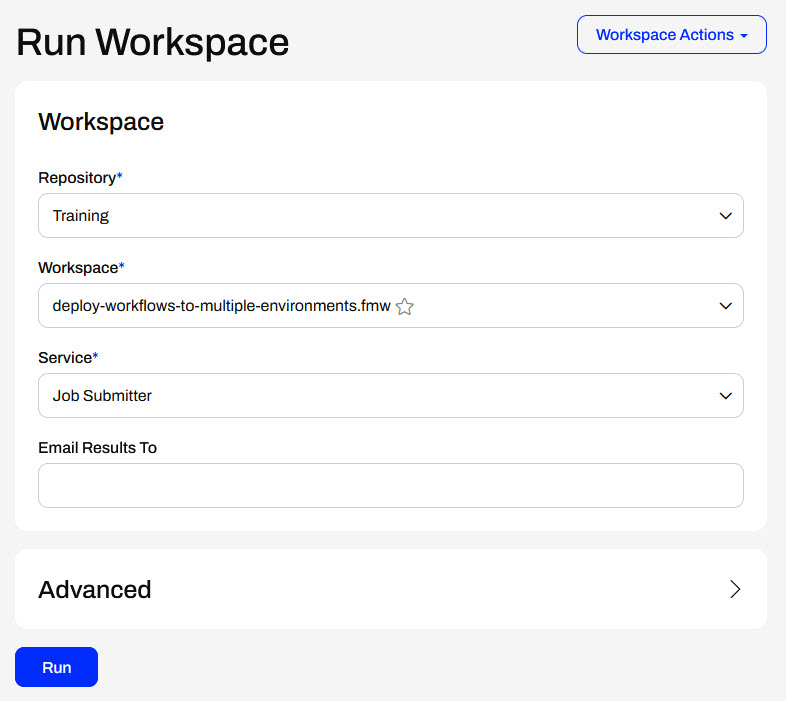
Navigate to FME Flow and run your recently published workspace.
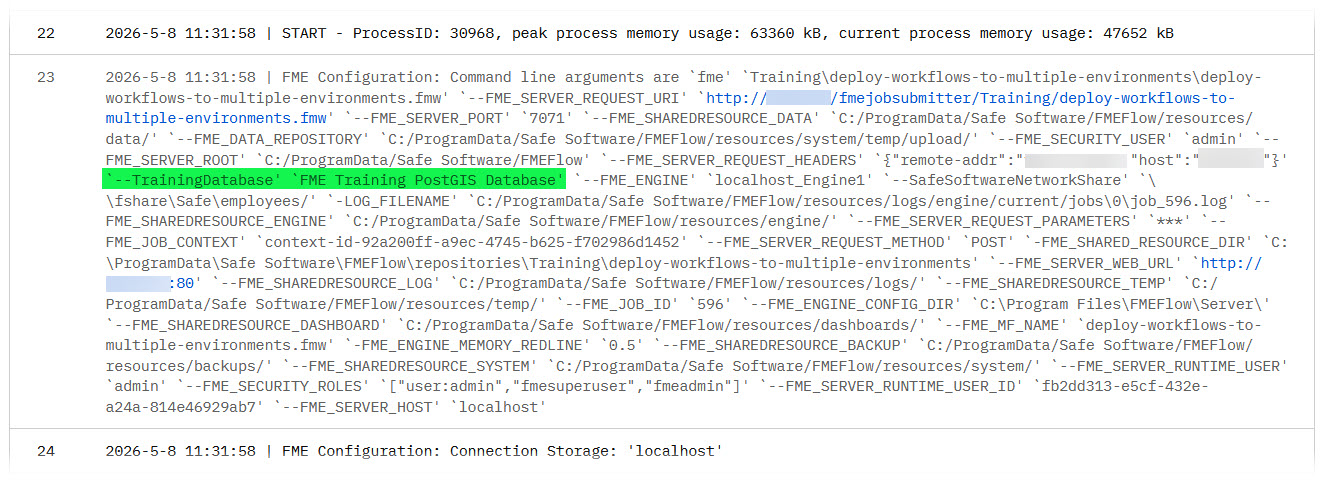
Once it completes, click View Details to open the job log. As you scan the job log, you will see references to the deployment parameter and the database connection it uses to run the workspace.

The workspace runs on FME Flow, and the reader's database connection references the FME Flow database connection through the deployment parameter. You have successfully helped Jennifer create a workspace that references deployment parameters to use a different database connection when it runs on different FME environments.
Deployment parameters are key-value pairs that let you use named parameter values across multiple workflows. One key use for deployment parameters is to allow workspaces uploaded to multiple FME Flow environments (e.g., development, test, and production) to run without requiring parameter values to be updated across these environments. When you reference a deployment parameter in a workspace, FME automatically uses its unique value, ensuring smooth workflow transitions. FME Flow stores deployment parameters; however, you can create and edit Deployment Parameters on either FME Form or FME Flow.
As of FME 2026.1, there are four types of deployment parameters:
Deployment parameters help accomplish the following:
You may create deployment parameters directly from FME Flow or FME Workbench, and they reside on FME Flow. To access and create deployment parameters from FME Workbench, you must connect to an FME Flow.
To create a deployment parameter from the Navigator window, right-click Deployment Parameters and select Create Deployment Parameter...
Since FME Flow stores all deployment parameters on FME Flow, the first step is to ensure you have selected and successfully connected to your FME Flow instance. You may have multiple FME Flow instances and connections, so it's important to ensure you connect to the FME Flow you want to create the deployment parameter for. For the parameter itself, you must give it a name, select the type, and then enter the value. A database connection parameter requires you to enter the database type and select a connection, while a text parameter only asks you to enter the text string value.
There's also an option to assign a different value when you use the parameter on FME Form, which is useful when testing workspaces before publishing.
After you create the parameter, you must link it to the reader, writer, or transformer that will reference the parameter value. For example, you might link a password parameter to a Connector transformer that requires a username and password authentication or link a database reader to a database connection parameter.
The deployment parameters you may link to include those you've created in FME Flow and FME Form, since FME Flow stores all deployment parameters.
If you connect to a different FME Flow instance from FME Form, the available deployment parameters will change to match the parameters stored on that instance. To ensure you see all the deployment parameters in FME Form, you need to sync from the FME Flow Connection toolbar. You should sync FME Form and FME Flow after you create or edit any deployment parameters.
In FME Form, you can only create and link to deployment parameters within workspaces. FME Flow manages, creates, and stores the parameters and their values.
The Deployment Parameter Store is a centralized repository for all deployment parameters for a given FME Flow instance. You access it from Connections & Parameters on the side menu. For each parameter, you see the name, type, and value you assign to the parameter.
To create a deployment parameter, click Create and fill out a form identical to the one in FME Form except for the FME Flow value.
Once you create the parameter, you can use it in your FME workflows. You can sync your FME Form to your FME Flow instance and link deployment parameters directly in the workspace before deploying it on FME Flow or reference deployment parameters in Automations on FME Flow.
You may link to deployment parameters in Automations or workspaces. For workspaces, you must link the parameter in FME Workbench and then publish the workspace to FME Flow. In FME Flow Automations, you link deployment parameters to the workspace's user parameters. For example, you configure a workspace with a database connection parameter as input and then link a database connection deployment parameter.
Now, if you migrate the Automation to another FME Flow, perhaps from your Development to your Production instance, the Automation will continue to reference the deployment parameter, but the value may be different. The Production FME Flow needs a different database connection to run the workspace. As long as the deployment parameter with the same name references the Production database connection, you don't need to alter the Automation to run on the Production instance to use the proper connection. Whether you reference deployment parameters directly in workspaces or in Automations, the same principles apply to migrating workflows between FME Flow instances.
Deployment parameters are essential in CI/CD (Continuous Integration/Continuous Deployment) workflows to deploy FME Flow consistently across different environments (e.g., development, staging, production) without modifying the core workspaces or project files. You can use the same components while dynamically injecting the correct values during deployment by setting environment-specific values—such as server URLs, database credentials, and file paths—as deployment parameters. Deployment parameters eliminate manual edits, reduce the risk of configuration errors, and make deployments repeatable and reliable.
When you use deployment parameters alongside the FME Flow CLI (Command Line Interface), you can pass deployment parameters directly into commands to automate FME Flow configurations. Without human intervention, the script would supply different parameter values based on the FME Flow deployment environment, enabling fully automated continuous integration and deployment.
For more information on deployment parameters and how to use them with CI/CD workflows and the CLI, see these tutorials:
Jennifer is a GIS Specialist for a city government's GIS department. She is continuing with her workspace from the previous exercise and wants to configure the workspace to use deployment parameters. The workspace reads data from a PostGIS database, and referencing the database connection as a deployment parameter will allow Jennifer to move the workspace across multiple environments without having to edit the workspace or connection. Jennifer wants to use a different database connection when she runs the workspace in FME Workbench and another when she runs it on FME Flow.
For this exercise, follow the steps below to help Jennifer create and use deployment parameters across FME Workbench and FME Flow.
You will only have one database to connect to for training, the FME Training PostGIS database. However, the theory of using deployment parameters will remain across FME Workbench and FME Flow to reference a different connection through the same parameter.
Navigate to FME Flow and open the Deployment Parameter Store. Click Create to make a new deployment parameter.
Set the following values:
Click Create, and FME Flow adds the deployment parameter and value to the Deployment Parameter Store. FME Flow will use this connection when any workspace linking to the TrainingDatabase deployment parameter runs on this FME Flow.
Open FME Workbench to the starting workspace (C:\FMEData\Workspaces\DeployWorkflowsWithFMEFlow\deploy-workflows-to-multiple-environments.fmw). This workspace is the same as the completed workspace from the previous exercise; you may continue with it if you have it open.
Click the drop-down arrow next to the FME Flow Connection, then Sync to sync FME Workbench with FME Flow.
In the Navigator, expand Deployment Parameters, and you will see your new database connection parameter.
To use a different database connection when running the workspace on FME Workbench, right-click the TrainingDatabase parameter and select Set Local Value...
Set the FME Form Value to the FME Training PostGIS Database and click OK.
This is the same PostGIS Training database as the FME Flow connection references. Due to training limitations, you only have one database available to connect to so they are technically the same on FME Form and FME Flow in this example. However, in real-world applications, the FME Form value would be a different database connection than the FME Flow one.
Expand the POSTGIS reader parameters in the Navigator, right-click on the Connection, and select Edit Parameter Value...
Select the TrainingDatabase deployment parameter for the Connection, found within User Parameters, from the drop-down menu.
The source database connection now links to the deployment parameter. Click OK.
Since deployment parameters control values based on the environment where the workspace runs, having a user parameter that allows the end-user to change the database connection value does not make sense. Expand User Parameters and delete the [SourceDataset_POSTGIS] Connection parameter.
The PostGIS Connection now only references the TrainingDatabase deployment parameter.
Run the workspace to ensure it uses the deployment parameter to link to the database connection before deploying it on FME Flow.
Publish the workspace to FME Flow, save it in the Training repository, and register it with the Job Submitter service.
A workspace with a connection would normally prompt you to choose whether or not to publish the connection along with the workspace to FME Flow. However, because the reader connection parameter references the deployment parameter, there is no direct connection by default to publish with the workspace.
Navigate to FME Flow and run your recently published workspace.
Once it completes, click View Details to open the job log. As you scan the job log, you will see references to the deployment parameter and the database connection it uses to run the workspace.
The workspace runs on FME Flow, and the reader's database connection references the FME Flow database connection through the deployment parameter. You have successfully helped Jennifer create a workspace that references deployment parameters to use a different database connection when it runs on different FME environments.
